Monday, March 28, 2011

Floor Cleaner

My hardwood floors are shiny and clean. Funny how something like that can make me happy.

I made a cleaner/polish out of 50 percent white vinegar and 50 percent canola oil. The oil conditions the wood, and the vinegar cuts grease and dirt. I "waxed on" with a rag dipped in the mixture and "waxed off" with a clean rag. If you are imagining me toiling and sweating and scrubbing in a frumpy old house dress, it wasn't like that at all.  (Especially the old house dress part. Do they still make those?)


Dare I say it was kinda fun? Okay, maybe not fun, but it was very satisfying seeing the dry scratched wood look warm and conditioned. And I got my six year old to help. Little kids love to do housework (for some crazy reason). If you have young children, give them the polish cloth!

So now I have shiny, healthy-looking hair--I mean floors--and no chemical headache from cleaners. And if you have extra vinegar-oil solution, you can even put it on your salad.  :-)  How healthy is that?

Monday, March 14, 2011

Sugar Petal Cake

photo by C. Scheper
My youngest had a Fairy Tale Princess theme for her 6th birthday party. There were dragons, knights, sugar cube castles, and a cake fit for a princess.

Jelly asked specifically for a cake with lemon icing and real flowers on it. I have no idea where a 6 year old would get an idea like that--she doesn't watch Martha Stewart--but I loved the idea.

I knew you could eat rose petals after watching the movie Like Water for Chocolate (which is a beautiful movie, by the way) so I decided to sugar rose petals.

I pulled the whole flower head off the stem and separated out the petals.  I used large pink and cream roses and smaller red ones.  Martha Stewart said to brush them with egg whites and sprinkle them with superfine granulated sugar.  I used pasteurized egg whites since I would be serving this to children, and I ground some regular sugar with a mortar and pestle. You can buy superfine sugar or grind your own with a food processor or coffee grinder, but why waste electricity when you can burn calories?  :-)

The result was beautiful, and the petals were delicious!

photo by C. Scheper

Saturday, March 5, 2011

MARSHMALLOWS!

When I first saw a recipe for marshmallows, my first thought was, "You can make marshmallows?" As if they grew on a plant or were made by fairies.  Yes, you can make them, but why would you?

First, most marshmallows have artificial coloring in them. It just boggles my mind--I mean, they're white! And second, store-bought marshmallows just can't compare to homemade.

(I can't remember where I got this recipe--I've had it for years. Thanks to whomever gave it to me.)

Marshmallows

powdered sugar for dusting
2 envelopes of boxed gelatin (4 envelopes if you want to roast your marshmallows)
8 Tbsp cold water
2 cups granulated sugar
1/2 cup cold water
1/4 tsp salt
2 tsp vanilla

- Dust a 9" square pan (or a medium-sized rectangular pan) with powdered sugar and set aside.

- In a small bowl, soak gelatin and 8 Tbsp cold water and set aside.

- Combine granulated sugar and 1/2 cup water in a large saucepan.  Boil sugar water until it reaches 240 degrees.  If you don't have a candy thermometer, you can eyeball it.  Sometimes, I just cook it until it starts to look thick, but it's safer to use the thermometer. (Besides, you'll need one for maple taffy on snow.)

- Pour the sugar syrup into a mixing bowl and let it partially cool. Add the gelatin mixture, salt, and vanilla.

- Beat until double in volume and white, fluffy, and thick.  Remove the wire wisk or beater from your mixer and lick all the marshmallow fluff off.


- Pour the marshmallow into the prepared pan.

- Lick the spatula. Lick the bowl, too. Stick your whole head in there, I won't tell.

- Set to cool several hours.

- Cut into 1 1/2 inch pieces and roll in powdered sugar. I use a knife dipped in warm water. It cuts through the marshmallow very easily. Eat.

Monday, February 14, 2011

Natural Red Velvet Cake

All Natural Red Velvet Cake
I'm not a very good cake icer.
Valentine's Day can present a challenge to those sensitive to food coloring (Red #40 is everywhere), but I look at it as an opportunity to try something new! This year, I decided to try to make a natural Red Velvet cake for Valentine's Day.

So what can you use (other than a bottle of red food coloring) to get that bright red color?  Beets!  God certainly didn't put them on earth for us to eat!  Ha ha!  No offense to those who like beets--I'm just kidding!  (not really.*)

And don't worry, you can't taste the beets at all after you add butter and sugar!

I usually color my red things with beet juice, but while googling, I discovered that beet juice in baked goods often fades (a problem with natural colors) and turns brownish.  Brown red velvet cake is not what I'm looking for.

Most of the natural recipes online had a lot of chocolate, so the red coloring is subtle, but I found one recipe for a very red Red Velvet cake using beet-root powder.  I've never used beet powder before, but I bought a bottle at the health food store**, and I am really pleased with the result!

My kids were so surprised by the red cake, they hesitated.  "Can we eat this," they all asked.  :-)  Yes!

Final verdict:  This was an unusual cake, with 6 eggs and only 3/4 cup flour.  It was very moist, but I'm going to try a white cake with the beet powder added. Then, I'm going to try a cake using beet juice to see how that compares.  I'm sure my kids will be disappointed at how much cake I'm making them eat.

_____

* I'm joking. I really am.

** I just about fell over when I saw how much the beet root powder was.  I almost didn't buy it, but my husband convinced me it would be worth it when the kids saw the RED cake.

Tuesday, February 1, 2011

Finger Knitting

 My kids are pretty quiet children--they like reading and drawing and legos, but sometimes winter days involve them climbing on each other, screaming loudly, and scaring the tar out of each other. So it is nice every so often to pull out the yarn and quiet them down with finger knitting.

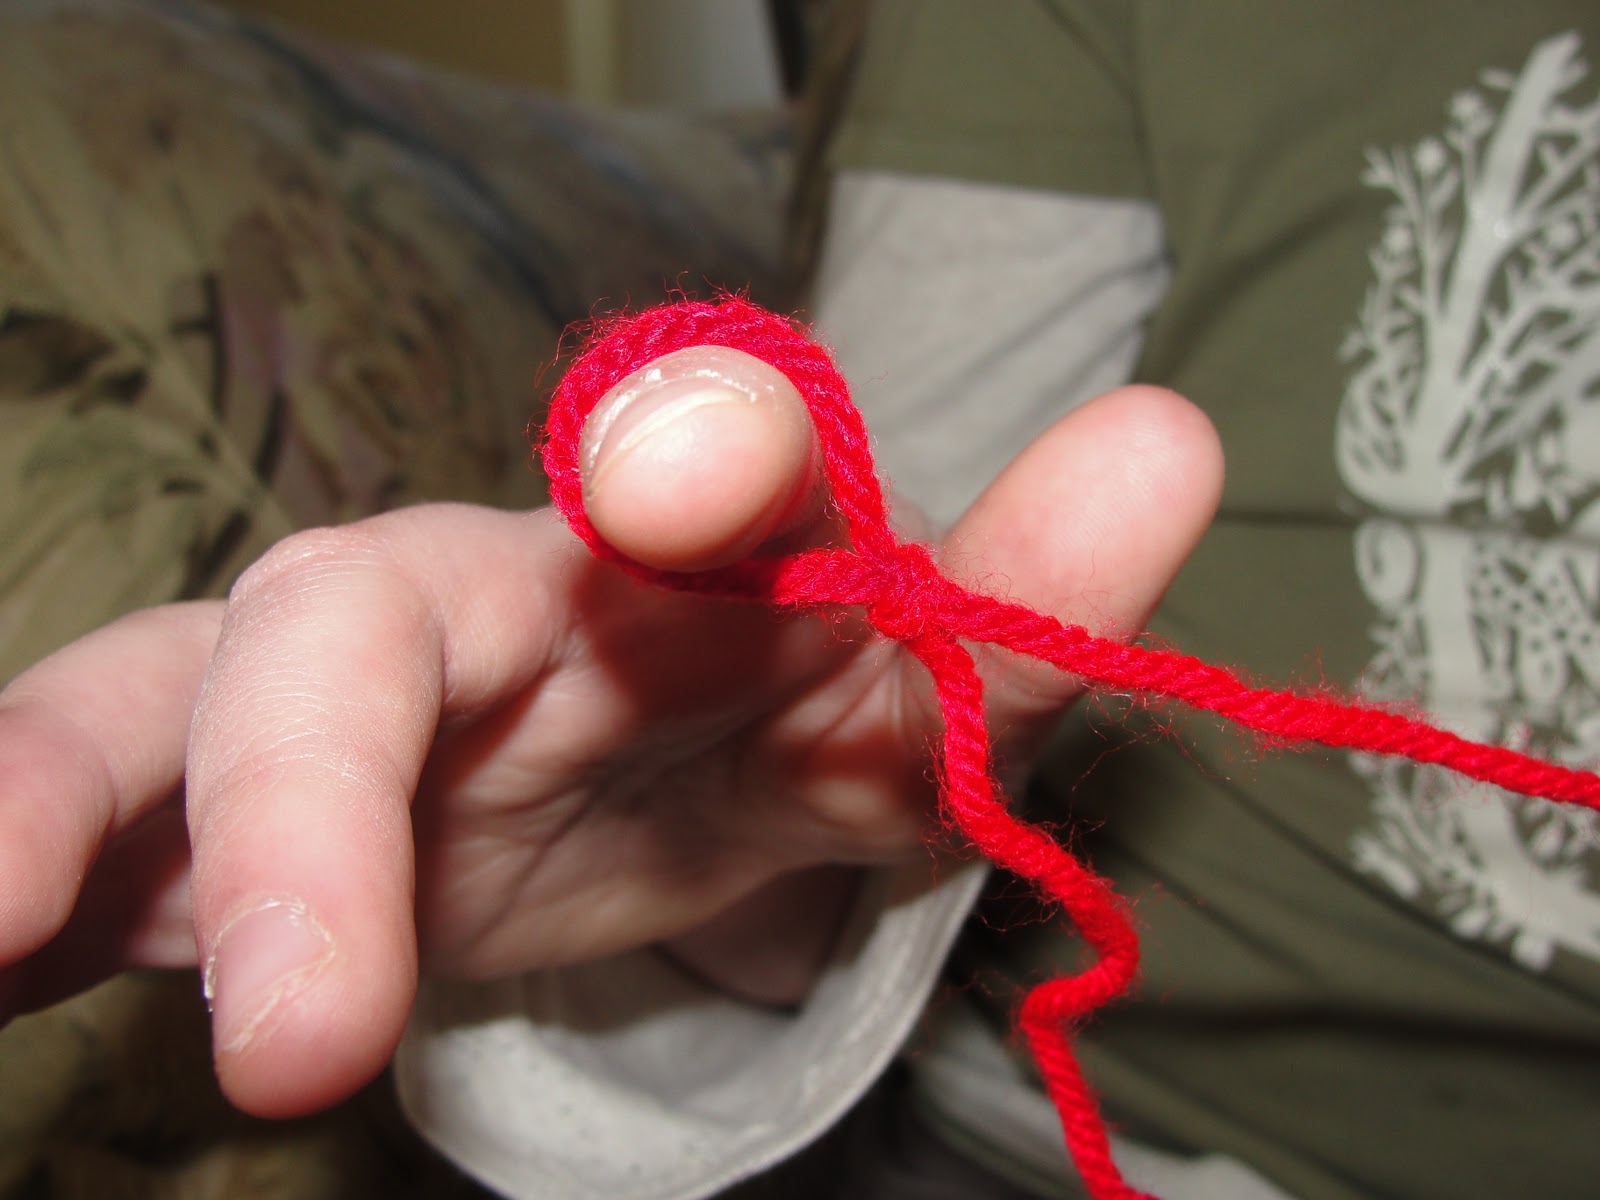
We started finger knitting with just one finger.  It's super easy, and from there we can progress to 4-finger knitting.


Start with a slip knot on one finger 


and bring the long piece of yarn (the one attached to the ball of yarn) 
and the loop it--front to back--over your finger.


Pull the original loop (the slip knot) over the string closest to your finger tip 


and let it fall off your finger. 


Tighten by pulling the loose "tail" of yarn.    That's it!


Add another loop of yarn and pull the first loop over the second again.


Look:  a video!


Make your knitted cord as long as you like.  When you're done, cut the tail and feed it through the loop and tighten.  Then you can trim the ends.

This is a really nice quieting activity.  It is easy and doesn't require a lot of time. We like to use our "play cords" (as we call them) for dress up, stuffed animal leashes, pretending to be animals with leashes, and lots of things.
Butter models her red cord.
Jelly's play cord is made out of really thick chenille yarn.  Nice!

Monday, January 31, 2011

Maple Taffy on Snow

Peanut with maple taffy
If you ask my kids what is the best thing about the snow, they would resoundingly say maple taffy! It rates way higher than sledding or building snowmen. We discovered this wonderful sugary treat on a trip to Mont Tremblant in Quebec.

It's super easy to make, natural, and yummy, and causes lots of anticipation dancing (like the way Snoopy dances). The only negative is that as soon as the first snowflakes start falling, the requests for maple taffy begin, and they continue to build and get more demanding until I threaten to not make the taffy.  ;-)

My kids pack a baking dish with clean snow while I cook the maple syrup. Use pure maple syrup for this, not pancake syrup (which is mostly sugar water with artificial flavoring added).

Heat the syrup until it reaches 235 - 240 degrees (the soft ball stage).  You will need a candy thermometer for this one, so if you don't have one, go buy one.  (The maple taffy alone makes it worthwhile.)  Once it reaches 235-ish, I usually take it off the stove and swirl it around a little to cool it off slightly. Then pour the syrup onto the packed snow in a strip and place a popsicle stick on the end.


Let cool for a few minutes and roll it up.  If it's still runny, let it cool a little more.  Eat, enjoy and repeat. Nom, nom, nom.


The Journey Toward Natural

I firmy believe that the closer to nature we eat and live, the healthier we will be and the healthier the Earth will be. I try to buy organic* foods when we can, use natural cleaners, and try to limit our exposure to toxins and plastics.

I started eating largely organically and shopping at a co-op when I was pregnant with my first child, my son, but probably the biggest steps I've taken toward living naturally came after my son was about 4 years old. We discovered that he is sensitive to artificial colors and preservatives (a long story for another post), so we avoid them as much as possible. This has lead me even further down a path toward healthfulness, for which I will always be grateful to him.

_______
* My opinion on organic foods has become a lot more complex recently.  I've moved more towards sustainable foods--grass fed beef and dairy, local agriculture, etc.  More on that later.