Wednesday, April 27, 2011

Homemade Marshmallow Peeps


Peep, peep!
Easter baskets don't seem the same without some marshmallow peeps. We make our own to avoid the artificial dyes that are on the store-bought ones. And YUM, they are tastier. (Hello, candy manufacturers, if you are listening, mass produce some natural peeps. I'd do it, but I'm kinda busy.)

All you need to do is follow the recipe for marshmallows from my previous post. I used four envelopes of gelatin instead of two--I wanted to make sure the marshmallow would hold it's shape when I made the peep shape. Also, I let it whip a little longer than usual to the point that the marshamallow didn't flow off the whisk like it usually does, but is thicker.


This is how you want it: thick and slow. That sounds very weird.


If it's not thick enough, this is what happens to your peeps:

Lazy peeps couldn't even hold their shape!

They turn into slugs. You don't want Easter slugs. So keep your marshmallow in the mixer until it's thick, thick, thick.

Now, for the piping. If you have a piping bag, you can use that. I prefer sacificing a plastic ziplock for this job (this from the mom who washes and reuses her ziplock bags) because it is very sticky and it is larger than my piping bag. Spoon the marshmallow into the bag, zip it closed and cut one of the lower corners off. I make about a half-inch wide hole so the peeps come out full (you don't want skinny worms either).

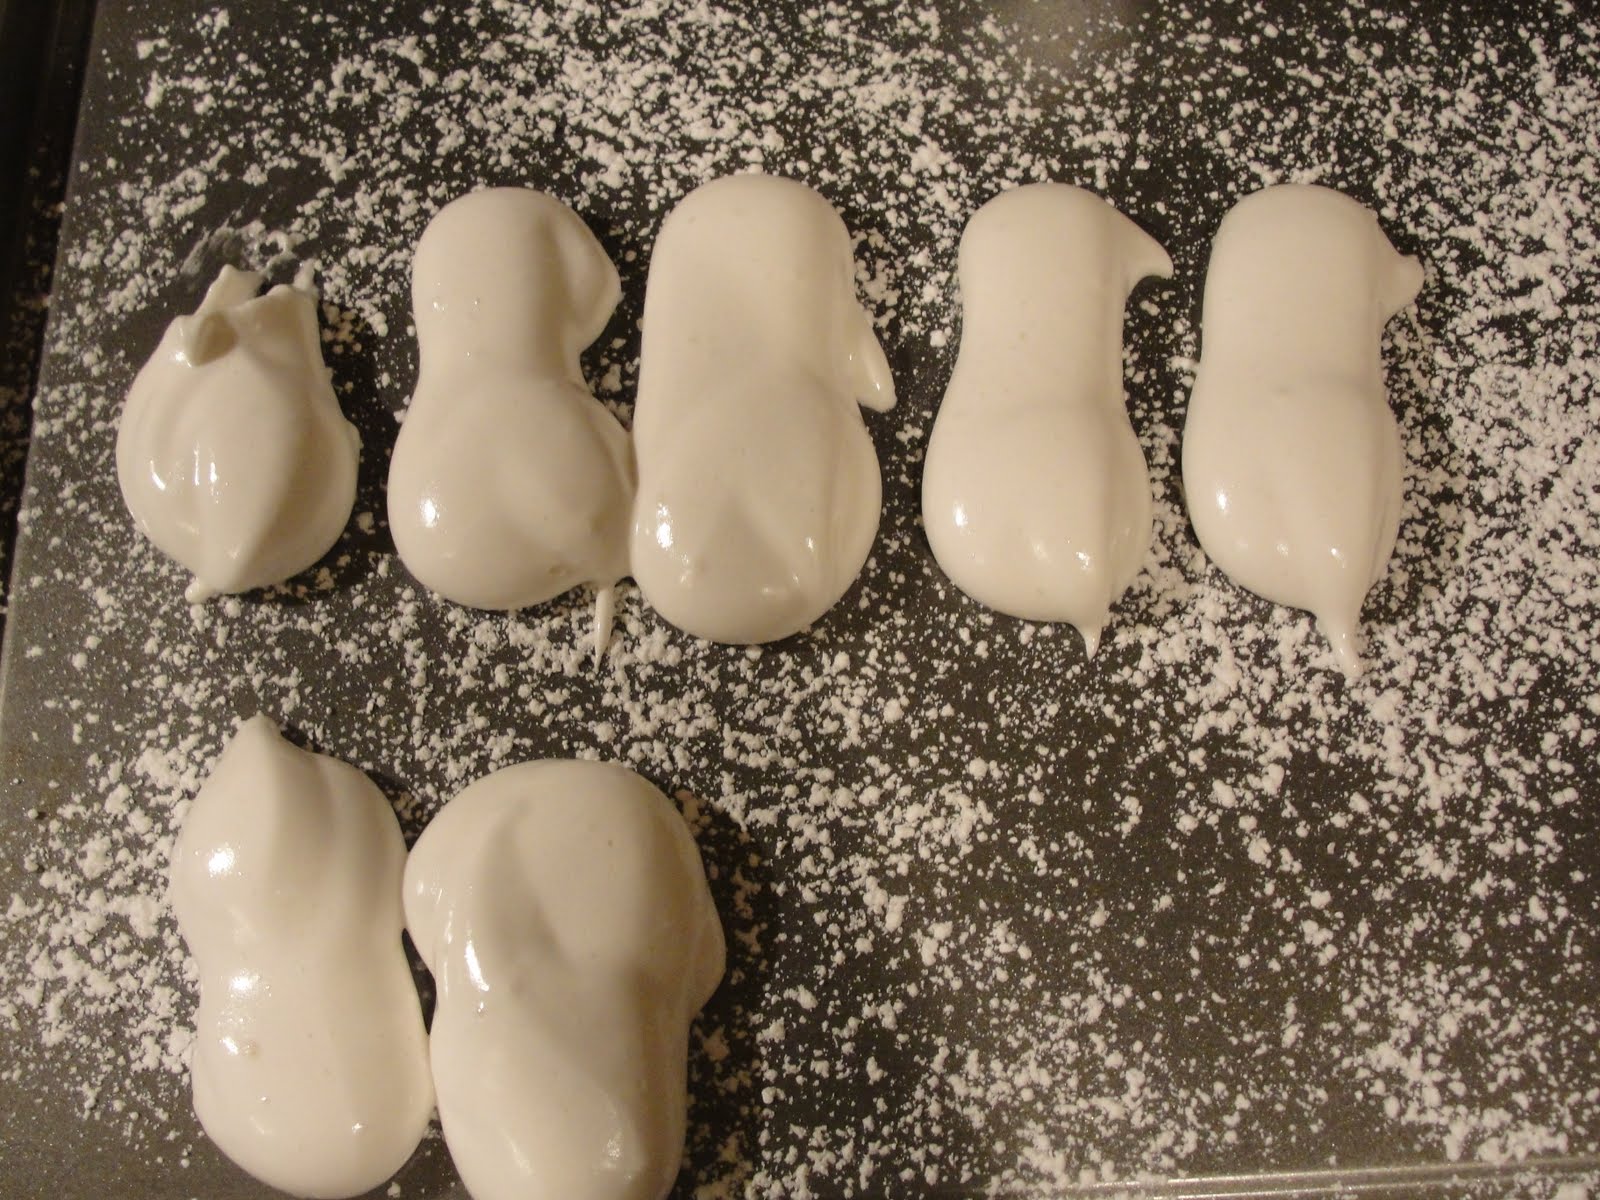
Pipe onto a baking sheet sprinkled with powdered sugar. Make a body by starting from the back and move forward. Go back about 1/4 of the way to make the head and stop squeezing the bag. Slowly pull foward to make the beak. We made a badly produced video for all you visual peeps (people, in this case. I don't think marshmallow peeps are reading this blog. Or are they?)


Here are my peeps:

They look like they're up to something.
Le them dry for about an hour, use a fork to unstick them from the baking pan, and roll in colored sugar. I bought some naturally colored sugar at Whole Foods a few years ago, and I still have it. I used a mortar and pestle to make it a little finer.

As a finishing touch, use a tooth pick and melted chocolate to give them eyes. 

And don't let your good-looking peeps ostracize the slugs. They're all the same, deep down.


Monday, April 25, 2011

Naturally-dyed Easter eggs

My kids made these naturally-colored eggs with blueberries and coffee!
Even though we have avoided food coloring for almost 6 years, we've never made naturally-colored Easter eggs. (I usually have the kids soak their eggs in the store-bought dye for only a few seconds to avoid dye migrating through the shell.) But this year, we made dyes from fruits and veggies.

I chose only a few colors to make it easier on myself. I followed the instructions here for making the dyes; I picked purple grape juice for lavender, red cabbage for blue, beet juice for pink, and turmeric for yellow. I also followed the suggestion to boil the raw eggs in the dye bath (rather than cook them beforehand) to get a more vivid color.

Grape Juice: FAIL!  The eggs cooked in purple grape juice were a complete failure--they turned out gray! And I was ticked that I wasted a half bottle of grape juice.  See my used tea bag in the background? Hee hee.

Eggs cooking in grape juice. Do not try this at home: a complete waste.

Red Cabbage: Success!  I didn't believe it that red cabbage would produce a blue egg, but it did--and a beautiful blue egg, at that. 

Cookin' the cabbage. Cabbage-inator. Cabbage-orama.

I boiled a head of purple (aka red) cabbage in enough water to cover, and cooked for about 15 - 20 minutes, until the cabbage looked pale and gross--the water was a fantastic bright purple (the color I want my hair to be). I strained out the cabbage, added the vinegar, and let the eggs simmer for 15 minutes in the dye bath. I wasn't happy with the color, which was a very pale blue, so I soaked them for another 20 minutes or so in a measuring cup (I needed my pot back). They looked great.

Turmeric: Success! Turmeric is one potent coloring agent. After just a few minutes in the turmeric water (about 1/2 Tablespoon in probably 4 cups water) the eggs were yellow. I left them in the water for 15 minutes because they had to cook. The eggs were bright yellow (and so were my fingers)!

There are eggs in that turmeric, honest.

Beets: failure. I am sad to report that my beet-colored eggs were a failure, because beets are usually my Champion of Natural Colors, and it has never let me down before. :-( At this point, I am blaming the cheap generic canned beets I bought.

Beet juice looks all nice and red, but don't let it fool you.
Surprise special guest: Green.  I dipped some of my blue eggs into the turmeric for a few minutes, with lackluster results, but I was happy, since I didn't really have a plan for green at all. The green was pale, but okay.
Beet-colored (thumbs down), turmeric yellow (wow!), red cabbage blue, and spur of the moment green.
The eggs at the top of the page were made by my kids at a local farm, so I'm not exactly sure how they did it, but the blue colored eggs were made with dye made from crushed blueberries and the creamy tan one was from coffee. I think those turned out really well!

Sunday, April 17, 2011

Hello, Spring!

 Wow! I love spring! I love seeing all the green leaves and sprouts poking out of the ground--abounding life!


Lily of the Valley
Blueberry Blossom
Hosta


Mourning dove fledgling

Azalea
I am not much of a gardener (see my previous attempts at gardening), but every spring, I love to plant, dig, and watch things grow. The miracle of life right before our eyes! Food from the earth! (I'm easily pleased and easily amazed. And that's a good thing.)


Last year we grew blueberries


 and pole beans (I was totally amazed at the tiny, twisting vines ... reaching, climbing) ;


and oregano and strawberries. My harvest was modest, since I have a shady yard, and my plants don't really get enough sun, and most of my "bounty" (I say that with a full-on smirk) was stolen by squirrels, birds, and other varmints.

I do mostly container gardening, since that allows me to move the plants around to where the sun is. Last fall, I transplanted the oregano and strawberries to the ground so they would survive the winter. I'm looking forward to seeing if they survive shade and creatures this summer.